
In XNet the cable itself does nothing clever. A network is a set of cables and connectors with exactly one Controller, and the Controller does all the work: in its screen you create channels and tell each connected block what to send or receive. One cable carries items, fluids, energy and information at the same time. The mod's manual adds that cables are not block entities, so even huge cable networks cost no extra performance. This page follows XNet 7.0.7 for Minecraft 1.21.1.
1. Cables and connectors
Cables come in four colors (red, green, blue, yellow) plus routing cable. Different colors never connect, even side by side, so you can run separate networks next to each other. Four  String, a dye, three
 Redstone Dust and a
 Gold Nugget give 16
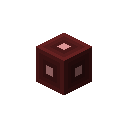 Red Network Cable.
A connector is the piece of cable that touches a chest or machine. When you place it, it links up with every suitable block around it, but nothing moves yet: that is set up in the Controller. A 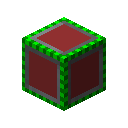 Red Connector takes four dye, three redstone, a
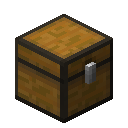 Chest and a
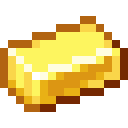 Gold Ingot. In a connector's own screen you can give it a name, which makes it easier to find in the Controller, and switch it on or off.
4 × String + any Red Dye + 3 × Redstone Dust + any Gold Nugget → 16 × Red Network Cable
 Red Dye#c:dyes/red
 Any #c:chestsRed Dye#c:dyes/redGold Ingot#c:ingots/goldRed Dye#c:dyes/redRed Dye#c:dyes/red
4 × any Red Dye + any Ender Chest (#c:chests) + 3 × Redstone Dust + any Gold Ingot → Red Connector
2. The Controller
The  Controller is built around an RFTools
 Machine Frame (so RFTools Base is required) with a
 Redstone Comparator, two
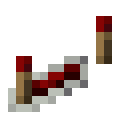 Redstone Repeaters, redstone, iron and gold. Put it on the cable network and give it power. In the default settings it stores 100,000 RF, accepts up to 1,000 RF per tick and uses 1 RF per tick for every active channel plus 2 RF for every operation; it uses nothing while idle.
 Iron Ingot#c:ingots/ironGold Ingot#c:ingots/goldIron Ingot#c:ingots/iron
2 × Redstone Repeater + Redstone Comparator + 2 × Redstone Dust + Machine Frame + 2 × any Iron Ingot + any Gold Ingot → Controller
- Connect a chest and a furnace to the same cable color as the Controller, each with a connector next to it.
- Open the Controller and create a channel in one of the 8 channel slots. Pick its type: Item, Fluid, Energy or Logic.
- For each connected block on the channel, create a connection and set it to Ext (extract from that block) or Ins (insert into it). Choose the side, priority and filters there.
- Enable the channel. The manual suggests keeping a channel disabled while you are still setting it up, so nothing moves too early.
3. Channel types and settings
| Channel | What a connection can set (from the mod's screens) |
|---|---|
| Item | Ins or Ext, priority, ticks per operation, single item, full stack or a set count per operation, extract from the first, a random or each slot in order, filter (with blacklist, tags, meta and NBT options), turn off when the destination inventory holds too few or too many items. The channel distributes by Priority or Roundrobin. |
| Fluid | Ins or Ext, priority, rate per operation (up to 1,000 mB, or 5,000 mB with an advanced connector, in the default settings), stop when the fluid amount is too low or too high. |
| Energy | Ins or Ext, priority, rate per tick (up to 10,000 RF, or 100,000 RF with an advanced connector, in the default settings), stop when the energy is too low or too high. |
| Logic | Sensor mode reads the items, fluid, energy or redstone signal in a block and compares it with an amount; Output mode sends a redstone signal to the block. Logic filters: direct, inverted, OR, AND, NOR, NAND, XOR, XNOR, latch, counter, timer and static. |
Every connection also has a redstone mode: ignored, on to activate, off to activate, or one operation per pulse.
Logic channels drive the network colors: sensors switch up to fifteen colors on or off in the Controller, and every connection of any channel type can listen to up to four colors and only works while all of its set colors are on. Do not confuse these with cable colors. To read a plain redstone signal, place a 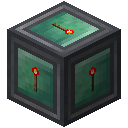 Redstone Proxy where the signal arrives and put a connector next to it; the
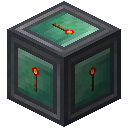 Redstone Proxy (update) also sends block updates to its neighbors.
8 × Redstone Dust + Machine Frame → Redstone Proxy
Redstone Proxy + Redstone Torch → Redstone Proxy (update)
4. Advanced connectors
An advanced connector moves items faster and can reach the block from other sides than the one it touches. Craft one from a connector with a  Diamond, an
 Ender Pearl and redstone, or upgrade a connector that is already placed with the
 Connector Upgrade Kit (sneak-right-click it on the connector).
| Default settings | Connector | Advanced connector |
|---|---|---|
| Energy stored | 50,000 RF | 500,000 RF |
| Energy rate | 10,000 RF | 100,000 RF |
| Fluid per operation | 1,000 mB | 5,000 mB |

Red Connector + any Ender Pearl + Diamond + Redstone Dust → Advanced Red Connector
Paper + any Ender Pearl + Diamond + Redstone Dust → Connector Upgrade Kit
5. Linking networks: Routers
A  Router connects separate Controller networks: one network on each of its six sides, or more through a routing network of
 Routing Network Cable and
 Routing Connector. Only named channels are visible to a router, so give a channel a name in the Controller first. In the Router you then publish it under a global name. Published channels with the same type and the same published name connect automatically. In the default settings a routing network carries up to 32 published channels.
 Iron Ingot#c:ingots/ironEnder Pearl#c:ender_pearlsIron Ingot#c:ingots/iron
2 × Powered Rail + Redstone Comparator + 2 × Redstone Dust + Machine Frame + 2 × any Iron Ingot + any Ender Pearl → Router
4 × String + any Black Dye + 3 × Redstone Dust + any Gold Nugget → 32 × Routing Network Cable
Gold Nugget#c:nuggets/gold
 Any #xnet:connectorsGold Nugget#c:nuggets/gold
6 × Redstone Dust + 2 × any Gold Nugget + any Blue Connector (#xnet:connectors) → Routing Connector
6. Wireless Routers and antennas
A 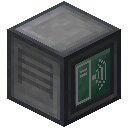 Wireless Router on a routing network sends all published channels to other wireless routers, as long as it has power. It starts in private mode, so only you can use it until you change that. On top of it goes an
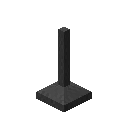 Antenna Base, and on the base either one or two
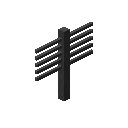 Antennas or an
 Antenna Dish.
| Wireless tier (as the settings name it) | Range (default settings) | Cost per published channel (default settings) |
|---|---|---|
| Tier 1 antenna | 100 blocks | 20 RF/t |
| Tier 2 antenna | 500 blocks | 50 RF/t |
| Infinite tier | no range limit | 200 RF/t |
The Antenna Dish's tooltip says it allows very extreme wireless range. The wireless router stores 100,000 RF and accepts up to 5,000 RF per tick in the default settings.
Ender Pearl#c:ender_pearlsEnder Pearl#c:ender_pearlsEnder Pearl#c:ender_pearlsEnder Pearl#c:ender_pearls4 × any Ender Pearl + Redstone Comparator + 3 × Redstone Dust + Machine Frame → Wireless Router
Iron Ingot#c:ingots/ironIron Ingot#c:ingots/ironIron Ingot#c:ingots/iron Iron Ingot#c:ingots/iron
4 × any Iron Ingot + Block of Iron → Antenna Base
 Iron Ingot#c:ingots/ironIron Ingot#c:ingots/ironIron Ingot#c:ingots/iron
4 × Iron Bars + 3 × any Iron Ingot → Antenna
5 × Iron Trapdoor + any Ender Pearl + any Iron Ingot → Antenna Dish
7. Hiding cables
Four paper, four wool and a glass block give 16  Facades. Use a facade on a block to copy its look, then use it on a cable or connector to hide it.

 Any #minecraft:wool
- White Wool
- Orange Wool
- Magenta Wool
- Light Blue Wool
- Yellow Wool
- Lime Wool
- Pink Wool
- Gray Wool
- Light Gray Wool
- Cyan Wool
- Purple Wool
- Blue Wool
- + 4 more
Any #minecraft:wool- White Wool
- Orange Wool
- Magenta Wool
- Light Blue Wool
- Yellow Wool
- Lime Wool
- Pink Wool
- Gray Wool
- Light Gray Wool
- Cyan Wool
- Purple Wool
- Blue Wool
- + 4 more
 Any #c:glass_blocks
- Glass
- White Stained Glass
- Orange Stained Glass
- Magenta Stained Glass
- Light Blue Stained Glass
- Yellow Stained Glass
- Lime Stained Glass
- Pink Stained Glass
- Gray Stained Glass
- Light Gray Stained Glass
- Cyan Stained Glass
- Purple Stained Glass
- + 6 more
Any #minecraft:wool- White Wool
- Orange Wool
- Magenta Wool
- Light Blue Wool
- Yellow Wool
- Lime Wool
- Pink Wool
- Gray Wool
- Light Gray Wool
- Cyan Wool
- Purple Wool
- Blue Wool
- + 4 more
Any #minecraft:wool- White Wool
- Orange Wool
- Magenta Wool
- Light Blue Wool
- Yellow Wool
- Lime Wool
- Pink Wool
- Gray Wool
- Light Gray Wool
- Cyan Wool
- Purple Wool
- Blue Wool
- + 4 more
4 × Paper + 4 × any White Wool (#minecraft:wool) + any Glass (#c:glass_blocks) → 16 × Facade