ScreenshotSettings is a mod for Quilt/Fabric that allows you to configure various things about in-game screenshots.
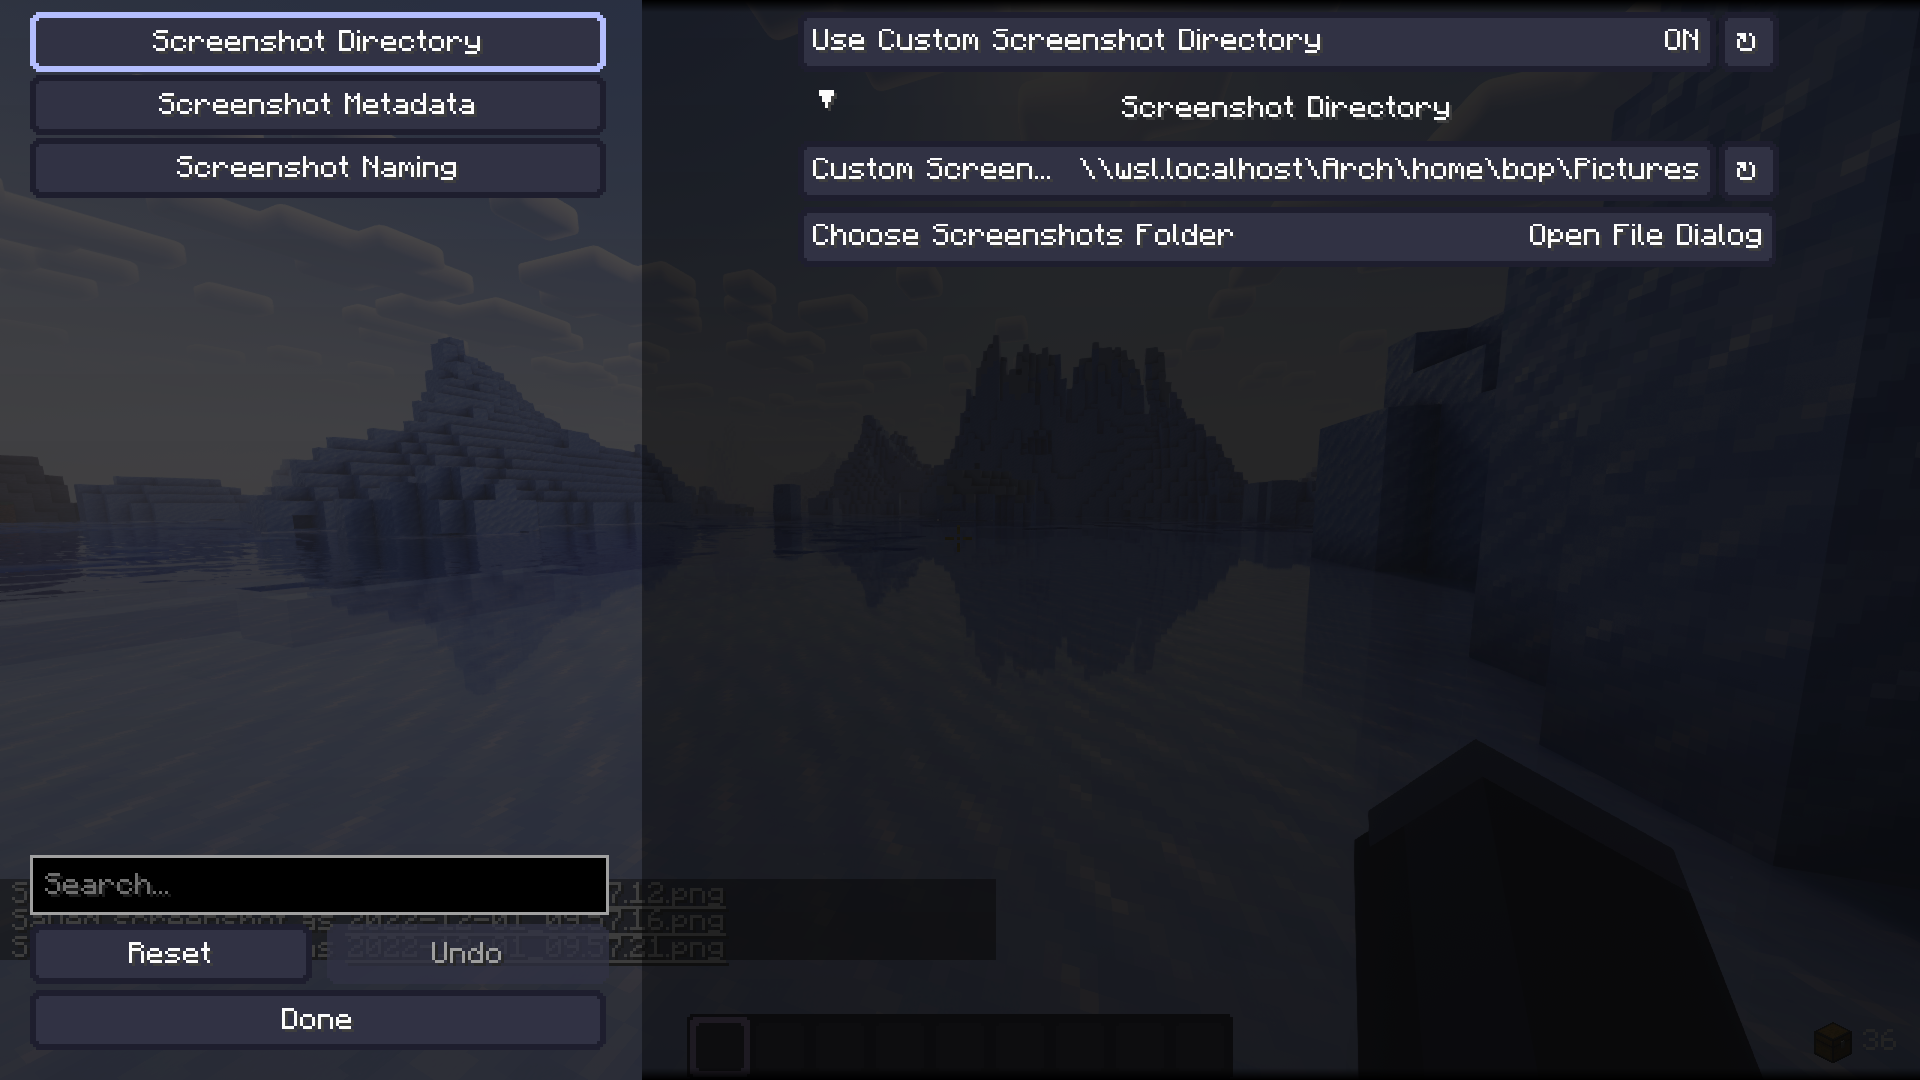
"Various Things" includes choosing where screenshots are saved to on-disk, as well as how you'd like them to be named. Relevant information to a screenshot can be optionally embedded into the filename or metadata, such as player position, rotation, active texture or shader packs, the name of the world or server the screenshot was taken on, and if on singleplayer, the world seed.
This should allow for convenient sorting/searching through screenshots by relevant metadata, and is also nice just for making your screenshots more accessible. (Seriously, I hate having to go into my AppData folder when I'm playing on Windows. It's terribly annoying.)
The file naming system is somewhat bare bones at the moment, only supporting 8 templates.
By including a / in your naming scheme, you can create a directory structure based on the templates above.
You can automatically organize your screenshots into folders according to what world/server they were taken on, or what shaderpack was in use at the time of the screenshot.
My favorite naming scheme is <world>/<datetime> because it gives me all the organizational structure I really need, as well as being effective at preventing naming collisions.
If you, however, were to have many servers saved as "Minecraft Server" and many singleplayer worlds named "New World", this wouldn't do much to help you.
The Windows Explorer cannot display the metadata included by this mod. You will need to get a dedicated program for windows to be able to see it.
To be frank, the existing solutions for viewing PNG metadata on Windows are somewhat disappointing. I may make a standalone tool for this in the future just to get something more accessible out there.
If you're comfortable using a command-line tool, you can use ImageMagick's identify -verbose command to see it.
ImageMagick has releases for Windows, Mac, and Linux, and if you're on Linux chances are you already have it installed anyway.
This is the way I'd recommend, because it allows you to set up scripts for searching through or organizing your screenshots, but if all you're interested in is viewing metadata, perhaps you'd be more interested in a GUI.
Because Minecraft uses URIs to resolve file paths on Windows, you can actually use the path to an installed WSL distribution as a valid save location to make manipulating your screenshot collection via WSL more convenient.
If you aren't comfortable using a command-line tool… the best way I've found (on Windows, at least) is exiftoolgui.
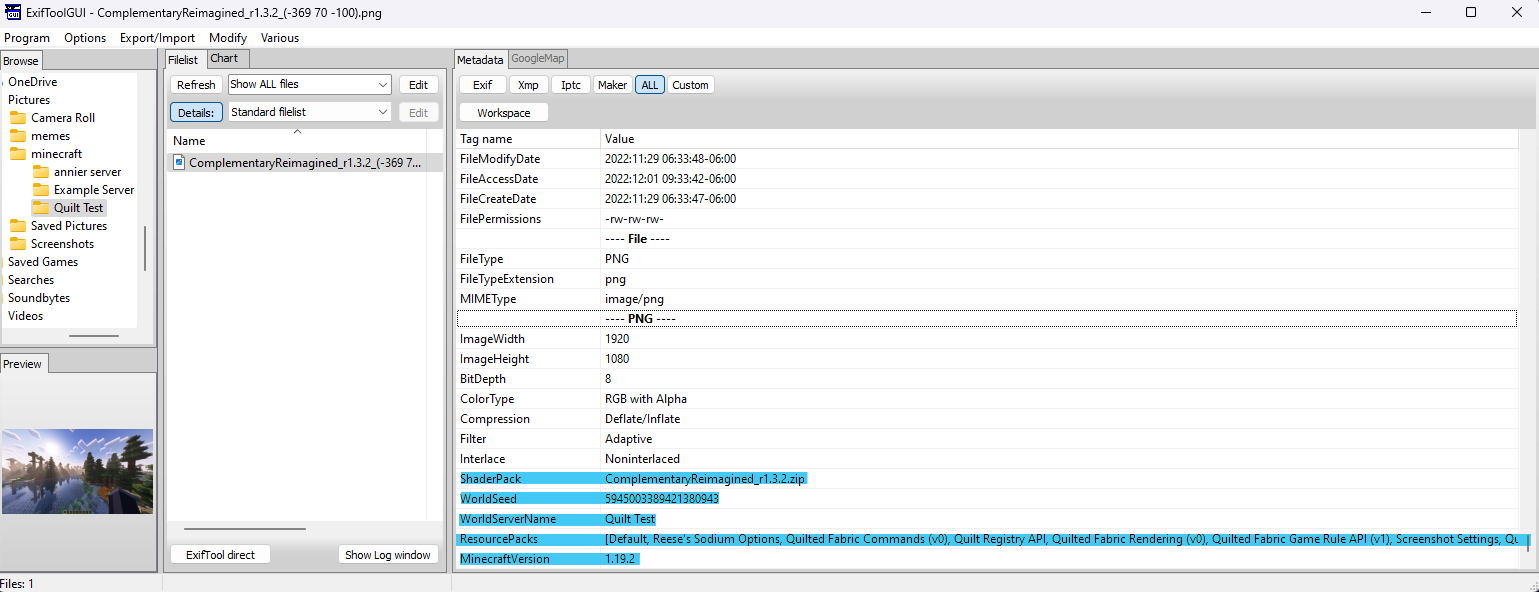
It requires that you have the base exiftool installed, but the "default" installation process for it isn't very user-friendly. For installing the base tool, I recommend Oliver Betz's exiftool for windows. It comes packaged with a GUI installer and is just generally more convenient.
Once installed, you'll want to navigate to your screenshot and view the All tab to see all of its metadata.
The metadata attached by this mod should appear at the bottom, as it does in the screenshot above.
MAKE SURE that you do not accidentally ship any custom config you might have for this mod to users. Add it to a .gitignore or something, just be careful that you don't end up making it so other people's games try saving screenshots to arbitrary non-existent directories.
I intend on eventually adding a way for the mod to detect that it is being run on a new unique machine for the first time, but I haven't decided how to implement that yet. For now, just don't ship your config.