A self contained mod for handling schematics in game. Schematics in the game directory schematic folder are auto loaded into the creative menu and can also be created using an empty schematic and selecting two points to make a new one. Loaded schematics show a material cost and size along with the blocks used. Large schematics are threaded and chunked to keep lag down to a minimum.


When you first click the desk it is empty. You can place an empty schematic in the lower left slot. Notice only your hotbar is accessible so make sure you have space and the right items.

You can cycle though schematics without paying for the gold and it will show the title and top 5 most common materials in order.

Put the gold in the top slot and viola you have a new schematic based on a saved file. Now its easy to bring in schematics you downloaded online, currently the schematics have to be in the server schematic location, local transfer has not been built yet.

You can place the schematic on a wall or on a ceiling facing any direction and it will build from that position. Note that it will only build upwards since there are certain issues with rotating schematics on other axes.

Left click it once and it will preview the schematic. If you shift (sneak) left click it during this phase it will rotate 90 degrees. Now you can see your build before to make sure its in the right spot. Don't worry breaking the sign will return the schematic to you.

Left click it again and it will show the required materials needed to complete the build. If you are in creative or changed the config setting it will build without adding in any materials, otherwise it will cost you. Whatever building materials are required to build the structure are needed or it will give an error. You don't need the 100% exact materials as long as the materials are the right type, like stained terracotta can be any color, same with wool etc...


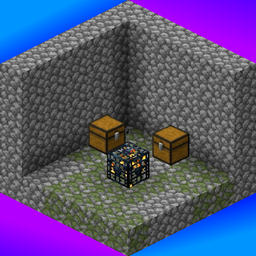
With an empty schematic if you want to create a brand new schematic, you totally can. Just left click a block to set the first corner.

Then select the other corner by left clicking the next block. Note you cannot select air so you might have to build a tower in order to select the area you need.

Right click on a block and you will be asked if you want to save the schematic that encompasses the area that has been selected. If you don't like the area you selected just right click in the air and it will reset the selected area.

And success! You now have a schematic that is a copy of the area you highlighted. It is named after you and the time it was created.
No files available for download.