release 7 for 1.8
Adds (nearly procedurally generated) dungeons, structures and other features to terrain generation. Generation features are stored as resource packs and may easily be replaced, created and shared with others. Customgen is based on the following things:
Short for generation feature, this is the base for a feature. A gen has a set of data, describing where and how it may generate. Currently it has a name, a resourcepack name, a level, a set of allowed biome types and a set of segments. A gens level will decide on what y level it will generate, the following values are available:
For a gen to generate in a biome, one of the biomes types has to match one of the biome types in the set of allowed biome types. An empty set means that all biome types are allowed. Last but not least we have the segments, this is where the actual content is stored.
Segments consists of a 16x16x16 cube of blocks with metadata and tile entities, this is what gets placed in the world when a gen generates. Segments have an interface number on each side, this describes what other segments that it may be fit to generate next to. A segment can be marked as a starting segment, when a gen generates into the world it will start with one its starting segments. Once the starting segment has been generated segments that have interfaces matching the interfaces of the starting segment will also generate and then segments with interfaces matching the interfaces of those segments, and so on until there are no interfaces left to fit new segments onto (there's currently a limit on 100 segments to avoid generating infinite loops).
Customgen adds a couple of blocks and items that are used in creating gens.
 Book of Custom Generation
Used to create gens and segments or to generate gens, segments and templates.
When the blocks in a segment are generated empty blocks will not be placed but instead leave the block previously generated by the vanilla (or another mods) terrain generation. Using these instead of stone lets a gen fit better into the existing terrain.
 Interface Block
Placing these on the side of a segment will add to its interface number on that side. Right click to increase its value. Multiple interface blocks may be placed on the same side.
 Loot placeholder
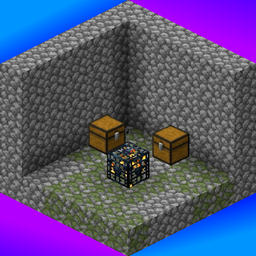
A Loot placeholder inside an inventory will be replaced with dungeon loot when it is generated, this should add more randomness and replayability to a gen.
Customgen needs minecraft forge to run, download the installer from here and run it. There should now be a folder called "mods" in your minecraft directory, place the customgen .jar file in that folder.
Gens that you've created yourself should be ready to generate, just run around and explore and they should pop up. If you've downloaded gens created by someone else, place them in the resourcepacks folder and restart your world. If you're running a server you may have to create the resourcepacks folder first. You can use the Book of Custom Generation to check if the gens were properly added.
A short tutorial on how to create a gen.
Templates can be found under the third tab in the Book of Custom Generation, the book can be found under the customgen creative tab. When saving a segment the blocks saved are based on a grid, to be sure you're building segments in the right place in this grid I like to start of with pasting a template. Try pasting a surface template if you're creating the starting segment for a surface gen, otherwise I would go for a corner template. If what you're planning to build is not going to fit inside one segment go ahead and paste more templates next to the first one.
Build all of the things, remember to use Empty Blocks for things that you do not want to replace. Try to keep track of the bounds of each segment.
If you've built multiple segments you're going to have to place interface blocks where the segments meet. With some clever use of interfaces we could create a gen with segments that repeat or are interchangeable with other segments. You can use the segment tab of the Book of Custom generation to see what interface values a segment is going to have once saved.
Open up the book, open the gen list tab and click the "add gen" button. Fill in the name of the gen and the name of the resource pack that you want it to be placed in. If the resource pack does not exist it will be created. Select the level type and and a couple of biome types that this gen would be fit to generate in. The weight field affects how often this gen generates compared to other gens, a higher value increases its probability to generate.
For each segment that you've created, go stand in that segment, open up the book and open the segment tab. Give it a name (segments in the same gen cannot have the same name, you'll overwrite the previous one by giving it the same name) and input the name of the gen and the name of the gens resource pack. Check the start checkbox for the segments that should be starting segments, don't let all of them be starting segments as only one starting segment can generate when a gen is generated.
Now you're set! If you want to share it with others you'll probably have to pack it up in a .zip archive, when doing this make sure that the assets folder is the first folder inside the archive, not a folder with the same name as the resource pack.
It should work mostly fine with other mods. Using blocks, items and tile entities from other mods will work and if some of the mods are missing it will simply skip those blocks, items or tile entities. I've noticed some problems when generating tile entities from other mods, multiblocks seem to be sketchy sometimes.
I would prefer if you could post bug reports and feature requests over on the github page, it's easier to manage that way. The source is on github, feel free to submit pull requests aswell.
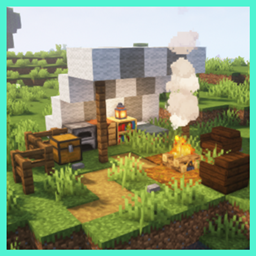
A set of underground structures. Makes use of, but does not require, buildcraft and tinkers constructs.

Caves in different variations. Makes clever use of interfaces to generate in different lengths.

A pack of features that generates at sea, arr!

No files available for download.