Areas is a mod which allows any player to easily created named areas in a world. This can be an area, region, zone, town, kingdom etc. This is done with a placed sign. On it you specify the radius, optionally the rgb value and the name. This means that the radius around the sign is now considered an area. Whenever a player enters this area, they receive a message at the top of the GUI with (by default) "Enter the area.". And when they leave "Leaving the area.". This can both be changed in the config.
Names are randomly selected when the sign does not contain one. There is a global RGB value for the messages specified in the config, but this can also be a unique value again specified on the sign. See the examples below for a better idea of how it works!
You can make areas overlap in order to create different area shapes. The join/leave message will only show when entering for the first time or leaving every overlapping zone.
Works in multiplayer, but players must also have the mod installed on their client.

![]()
![]()
![]()
![]()

![]()
All available config options:
giveUnnamedAreasRandomName default true
When enabled, gives signs without an area name a randomly chosen one from a preset list.
radiusAroundPlayerToCheckForSigns default 100, min 0, max 1000
The radius in blocks around the player in which to check for area signs.
defaultAreaRadius default 30, min 0, max 1000
The default radius for areas when it's left empty on the sign. It will be added automatically.
sendChatMessages default false
When enabled, sends the player the area notifications in chat.
showHUDMessages default true
When enabled, sends the player the area notifications in the HUD on screen.
showEnterMessage default true
Whether a message should be sent when a player enters an area.
enterPrefix default "Entering "
The prefix of the message whenever a player enters an area.
enterSuffix default "."
The suffix of the message whenever a player enters an area.
showLeaveMessage default true
Whether a message should be sent when a player leaves an area.
leavePrefix default "Leaving "
The prefix of the message whenever a player leaves an area.
leaveSuffix default "."
The suffix of the message whenever a player leaves an area.
showHUDTextShadow default true
Whether the text shown should be drawn with a shadow.
HUDMessageFadeDelayMs default 4000, min 100, max 360000
The delay in ms after which the HUD message should fade out.
HUDMessageHeightOffset default 10, min 0, max 3000
The vertical offset (y coord) for the HUD message. This determines how far down the message should be on the screen. Can be changed to prevent GUIs from overlapping.
HUD_FontSizeScaleModifier default 1.0, min 0, max 10.0
Increases the font size of the text in the HUD message. If you change this value, make sure to test the different GUI scale settings in-game. 6.0 is considered large.
HUD_RGB_R default 100, min 0, max 255
The red RGB value for the HUD message.
HUD_RGB_G default 200, min 0, max 255
The green RGB value for the HUD message.
HUD_RGB_B default 50, min 0, max 255
The blue RGB value for the HUD message.

/areas - Shows all area signs around the player.


To create an area with a radius of 10, use one of these prefixes. They do the same, choose which one you prefer:
This will create an area with a random name by default.
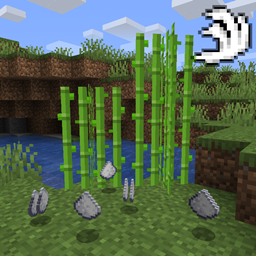
A simple example; a desert island area with a radius of 10:
Entering the desert island:

When breaking the sign, the area ceases to exist:

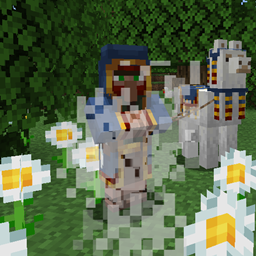
Another example with a custom colour; A savanna village area with the rgb value after the [RGB] prefix:
These three signs result in exactly the same.
Entering the savanna village:

Leaving the savanna village:

An area being randomly named with a radius of 30:

Another randomly named area with a radius of 20:

And another example with an unnamed area with a radius of 5 by not entering a name, and the config option 'giveUnnamedAreasRandomName' set to false:


You may freely use this mod in any modpack, as long as the download remains hosted within the CurseForge or Modrinth ecosystem.
Serilum.com contains an overview and more information on all mods available.
Comments are disabled as I'm unable to keep track of them across so many separate mod pages.
For issues, ideas, suggestions or anything else there is the Github repo. Thanks!