"VisualProspecting but for 1.12"
A mod that adds various overlays to map mods.
Requires CodeChickenLib and MixinBooter
Supports Journeymap and Xaero's Minimap and World Map.
Overlays can be toggled by either a button on the world map or by pressing a keybind in-game (unbound by default - check the controls settings)
The location and order of the buttons can be customized in the config:
The order of the buttons can be changed either by a list or just reversing the order
Reversing the order does not require restarting minecraft, while modifying the list does not
Changes to the order list will also affect what order layers render in if multiple are enabled
Journeymap users can put the buttons either next to the main map types or in their own toolbar on the right of the screen
Xaero's World Map users can put the buttons anywhere!
Prospection data can be shared to other players with /vo share <player name>. This requires VisualOres to be installed on the server and both clients.
Your client-side cache folder can be opened with /vo openCacheFolder, and all client-side prospection data can be reset with /vo resetClientCache. Resetting the cache is not reversible!
Requires GTCEU version 2.7.3
Requires VisualOres to be installed on both the client and server
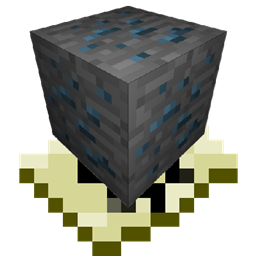
Displays ore veins you have discovered. Pick up surface rocks, right-click ore blocks, or use an electric prospector on ore mode to discover veins.
Press the "action key" (default: delete) while hovering over a vein to mark it as depleted (or not depleted).
Double-click a vein to mark it as a waypoint, and again to unmark it.
VisualOres will attempt to generate ore vein locations for worlds that were generated before it was added, but it will generate some inaccurate vein positions!
Veins may be missing, and veins that do not exist may be marked.
(Still better than nothing, though. Most veins should be accurate.)
Displays underground fluid fields you have discovered. Use an electric prospector on fluid mode to discover fields.
(Yes, fields being shown as larger around x=0 and z=0 is correct. Underground fluid veins generated with GTCEu 2.7.2 and earlier have a bug with generation that causes this.)
Also contains integration with Immersive Petroleum
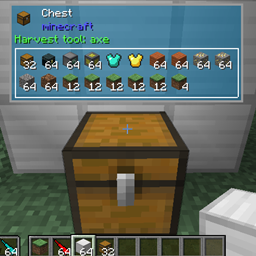
Displays excavator veins you have discovered. Pick up a core sample to add its data to your map.
Double click on a vein to toggle it as a waypoint.
Displays aura/flux levels you have seen in chunks. Hold a thaumometer to add the levels shown in the hud to your map.
Displays starlight concentration levels. Hold a fosic resonator to add nearby starlight levels to your map.
Lighter blue means higher concentration (the areas shown in-world with white sparkles).
Displays fluid veins you have discovered. Hold an ichosic resonator to add veins to your map as the particle effects spawn.
(This means veins are only discovered when a particle effect spawns in their chunk, so it can take some time before the fluid in a specific chunk is discovered! Be patient.)