This mod allows you to build "Runes", which are typically 5x5x1 blocks of obsidian. You then create a signature for the Rune, which binds it to other Runes with the same signature.
All feature updates and bug fixes will be made available for the following versions of Minecraft:
If you would like me to support any versions not listed here, please open an issue on the Github repo. Thanks!
This mod adds a single block: The Rune Core.
![]()
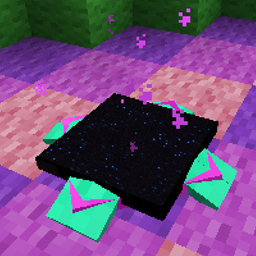
The Rune Core is the primary component of a Rune. It stores the energy for the Rune and controls transmission and retrieval of Entities.

This mod does not add any new items.
This mod adds a single structure: The Rune.
Players construct the Rune and utilize it to teleport to other Runes with the same signature. A Rune is typically a 5x5x1 structure (horizontal). The following diagram outlines the structure of a Rune (note that the dirt blocks can actually be any material):
![]()
![]()
![]()
![]()
![]()
![]()
![]()
![]()
![]()
![]()
![]()
![]()
![]()
![]()
![]()
![]()
![]()
![]()
![]()
![]()
![]()
![]()
![]()
![]()
![]()
Runes are primarily constructed from Obsidian, with a Rune Core in the center. The Blocks immediately North, South, East and West of the Rune Core make up the Rune's signature.
The Signature components can be any block that you wish.
To create a usable teleport, you will need to create two or more Runes with the same signature.
Right clicking on the Rune Core of a completed Rune structure will activate the Rune. The Rune will draw energy from the surrounding environment, which you will observe as a lightning strike hitting the Rune.
If you do not see a Lightning strike when you attempt to activate the Rune, it means that the Rune is invalid. Check that your Rune structure matches the requirements defined above.
Once you have constructed and activated two or more Runes with the same signature, you can teleport between them by right clicking the Rune Core in the center of the Rune.
When you use a Rune to teleport, you will be transported to the next Rune with the same signature. You will be transported to each Rune with the same signature in the same order that each Rune was activated.
By default the rune size is 5. Values of 3 or more are supported. The value must be an odd integer. The smallest valid rune size is 3. You can change this value via the runeSize configuration option of the general section in the blink.cfg file:
general {
  # The size that valid runes must be. Must be an odd integer >= 3.
  I:runeSize=5
}
For example, a rune of size 3 would be constructed as follows:
![]()
![]()
![]()
![]()
![]()
![]()
![]()
![]()
![]()
By default the runes will catch on fire if they are damaged. The value must be a boolean. Damage is defined as being hit, regardless of whether or not a block breaks. You can disable this behavior via the burning configuration option of the general section in the blink.cfg file:
general {
  # Should the rune burn up on destruction?.
  B:burning=true
}
By default, traveling via the runes is free. However, there are two configuration settings that you can set to apply a level cost for traveling:
general {
  # How much should teleporting to a different dimension cost in levels?
  # Must be an int >= 0
  I:levelCostForDimensionTransit=0

  # How much should teleporting to another rune cost in levels per meter?
  # Must be a double >= 0.0
  D:levelCostPerMeter=0.0
}
The level cost for dimension travel will be applied if the destination rune is not in the same dimension as the source rune.
The level cost per meter will be applied based on the distance between the two rune cores. The resulting double will be rounded up to the nearest int.
The total travel cost is the dimension travel (if applicable) added to the calculated distance cost rounded up to the nearest int.
If the player has enough levels to cover the travel cost, then they will be teleported and the cost deducted from their levels. If the player does not have enough levels to cover the travel cost, the teleportation will fail. This will be indicated by a fizzle sound and a puff of smoke coming out of the rune core.
Note: This config file will be generated when you first launch Minecraft with the mod installed.